First, let me say that I'm not a fan of Photoshop. It has its times, sure, such as when you need to edit a photo. But there's plenty of other things it ISN'T meant to do. Such as everything else.
It upsets me that so many artists use Photoshop, especially for cartooning. Whever they say "look I found an awesome new fast way to ink" or "look I found an awesome new fast way to color outlines", I die a little on the inside. Admittedly, I'm horribly biased towards vector artwork. It's an aquired taste, and I'd DEFINITELY reccomend using a trial version of Illustrator before shelling out any cash. Oh, and make sure you're getting Illustrator CS2 or higher, since older ones don't have a Live Paint tool.
The following is a description of the method I went through to draw one page of my "Concentration Portfolio" for AP Studio Art (the portfolio was a comic. About birds with knives). By the end of the 12-page project, I was so fast with this method that I drew the last 6 pages the night before they were due.
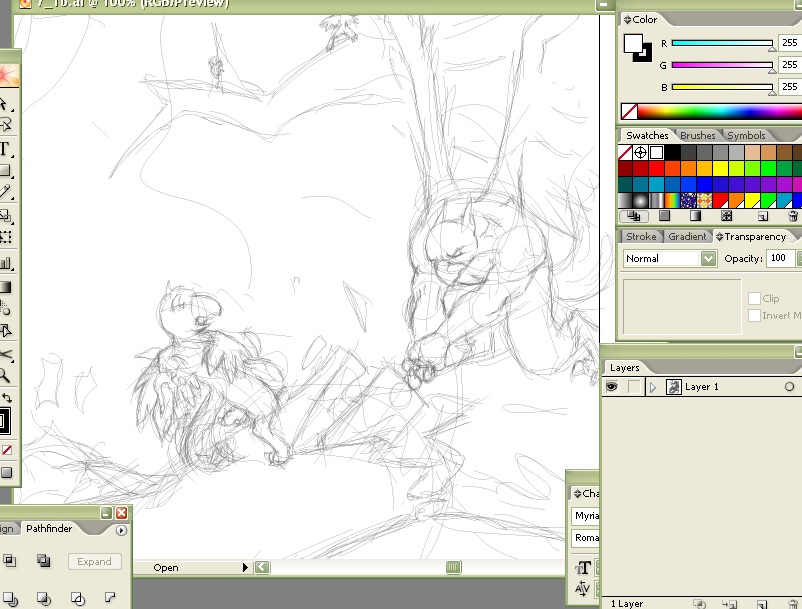
Here's my sketch. I did it with a Wacom tablet on one layer, creatively default-titled "Layer 1". I like to do my sketches with the pencil tool. A lot of people hate illustrator from the get-go because the pencil tool's default settings make it change lines you just drew. Here's the settings everyone inevitably puts the pencil tool at one day after getting the program:
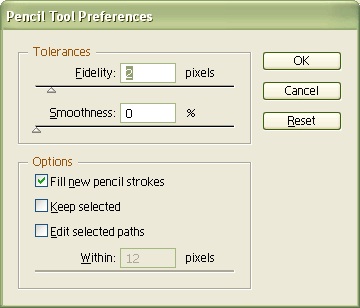
I don't know what Fidelity is, but 2 sure seems to work well. Also, when drawing lines, MAKE SURE you have the fill color off. Illustrator is for drawing shapes, and it needs to know if you don't want anything inside them. Sketching in it is nice, however, since you can easily select and move lines.
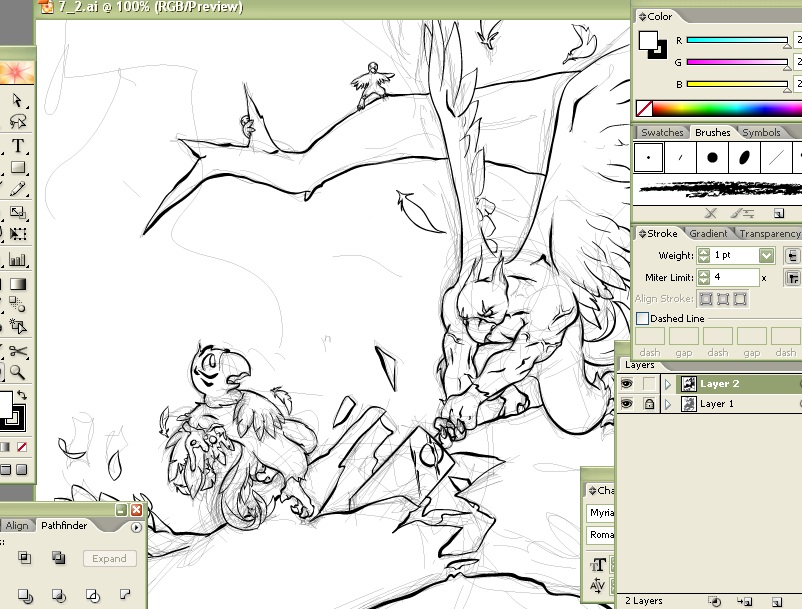
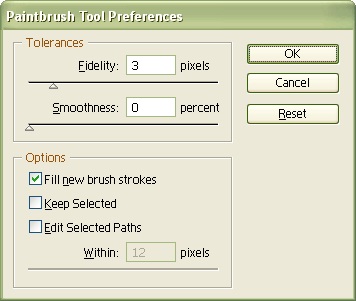
Then I created a new layer and inked it up. I like to ink with the Paintbrush tool and a custom pressure-sensitive brush. You really have to play around with the brush settings until you find something that hums for you. The settings I use for the Paintbrush tool itself, though, are:
Okay, next step is more part of my personal coloring method I used to turn out six of these pages in one day. First, duplicate your ink layer. Hide the one on top.
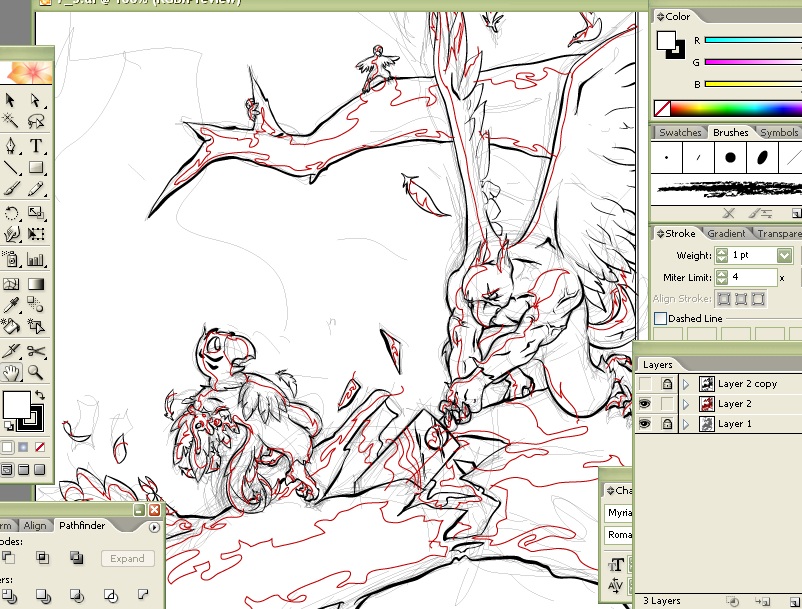
The red lines are part of how I cel shade. I use the red lines to block off the flood fills, then use the Magic Wand to select all red lines and delete them. There's plenty of other ways to color; in an older picture I drew
here (for Hare's contest), I just made a shading layer and drew some transparent colored shapes over the characters as shadows and highlights.
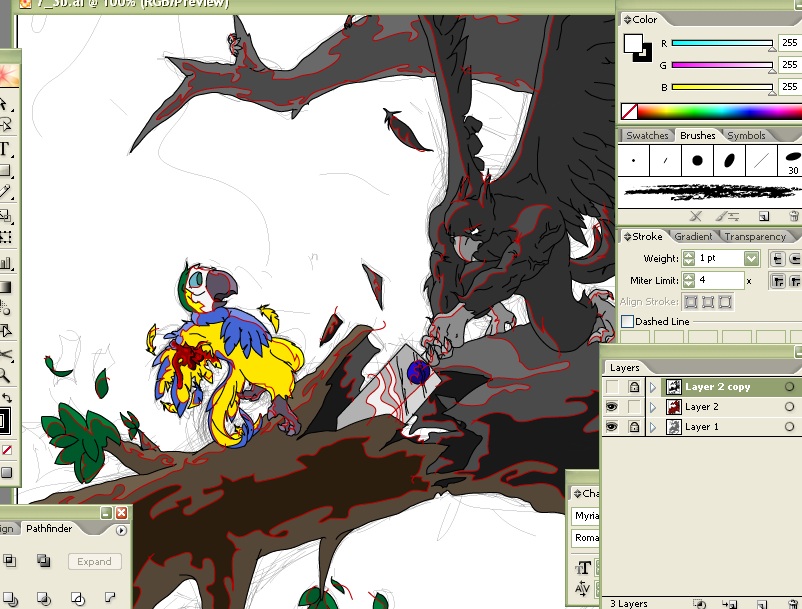
Anyway! Then I predictably crack out my Live Paint thingy and go at it. You need to select everything on Layer 2 and click it with Live Paint to convert it to a Live Paint object. Note, however, that this makes the varied line thickness go away. That's why I duplicated the ink layer.
The next thing's kind of unique to my style, too. I'd been abusing gradients regularly in this comic, so I had no choice but to hit this page with my gradientstick as well.
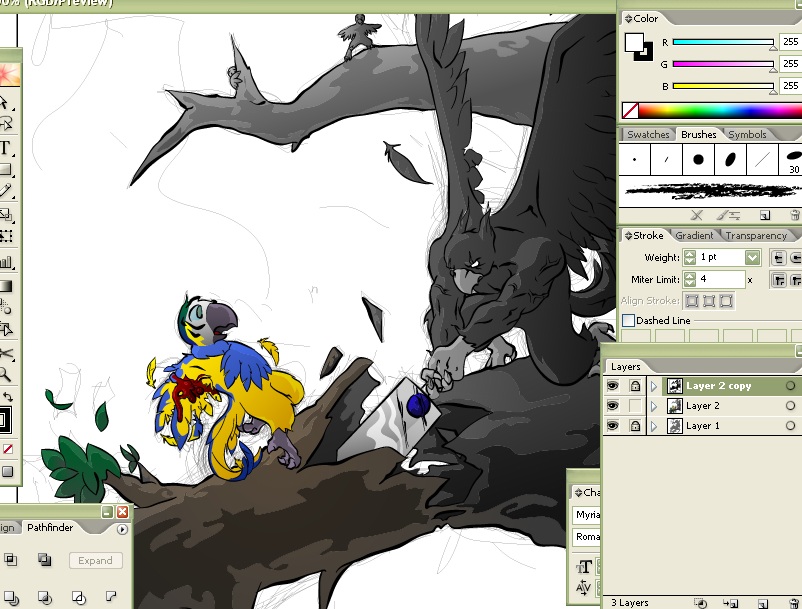
Note that I made Layer 2 Copy (the inking layer's duplicate) visible again. To add the gradients, I first selected the Live Paint object (aka all of layer 2) and used the "Expand Live Paint" function. This turns it into shapes - in a group of two groups however, one containing fills and one containing lines. You need to ungroup these, throw the blob of lines away, then ungroup the shapes from eachother. Then I went to the shapes and began clicking gradients onto them.
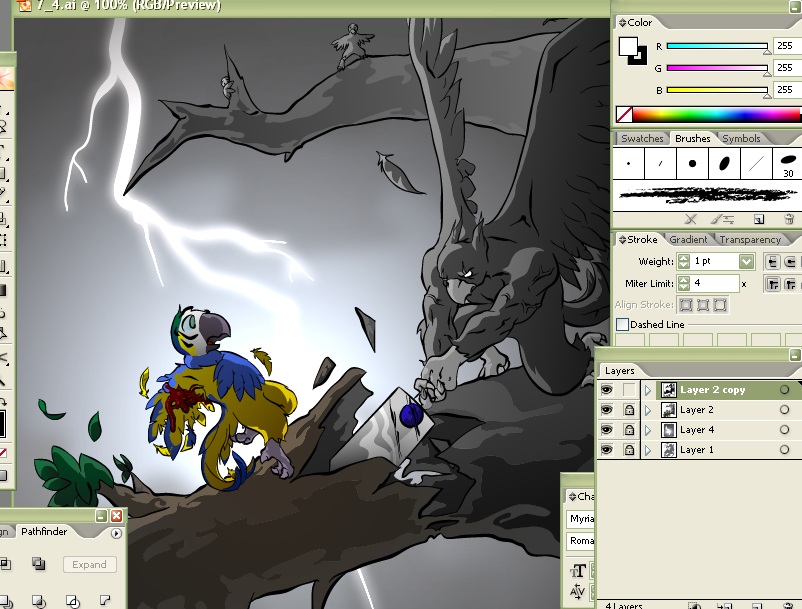
Slam in a background. I named that sonofa "Layer 4". Look, lightning. Apart from being a horrid cliche, the lightning helps me move the viewers eyes in a "U" shape, both to guide him throug the page and to imply downward impact force.
And now, for the part you've all been waiting for,
how to do colored outlines in Illustrator. You've got "Layer 2 copy", which contains all your outlines. Go there, select the outlines, and pick a color. You can select more than one outline by dragging over it. And then you're done; you've colored the outlines.
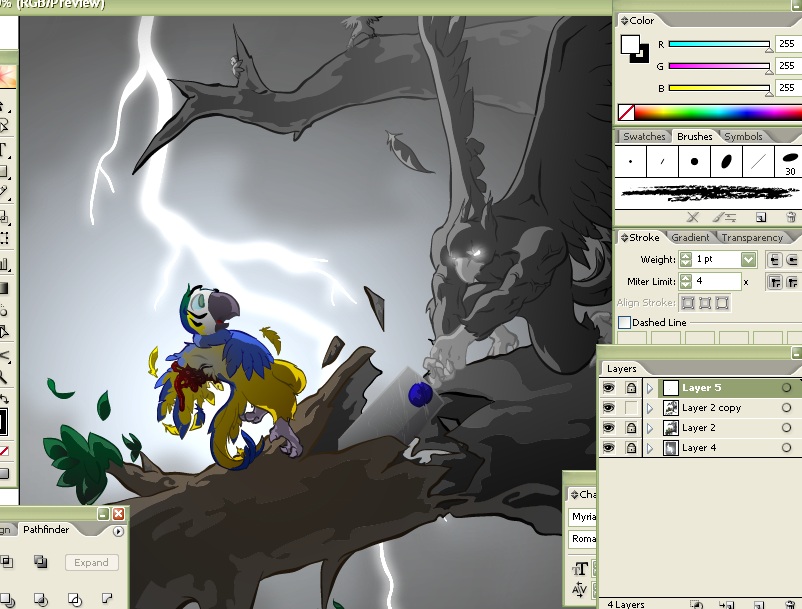
Note I deleted the sketch layer and put on a few effects. Also, I made the outlines gradients too, by using the "expand" command on them (converting them to fills).
So, then you're done. Or I was done, anyway. It sounds complicated, but when you get the hang of it Illustrator blows Photoshop away. And it lets you do things like this at a rate of 6/day, evidently.
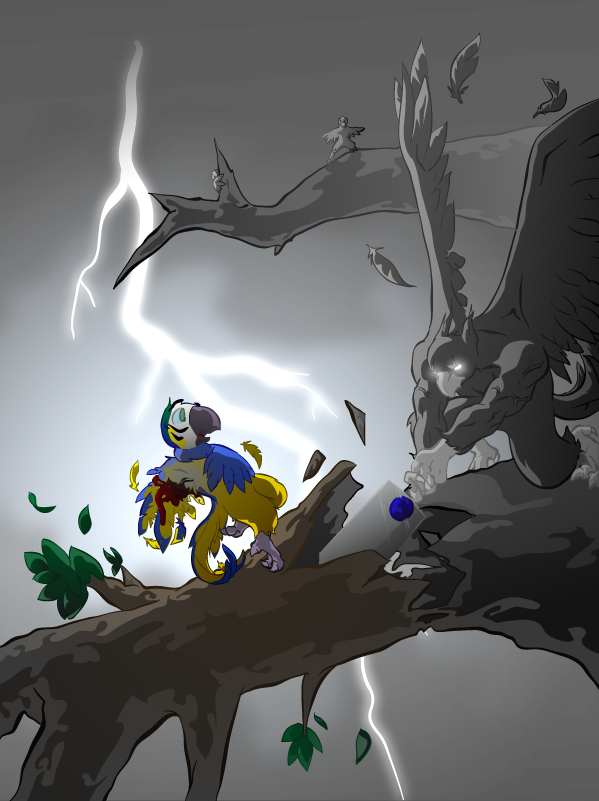
Oh, and don't forget you also have the advantage of infinite rescaleability. Here's a zoom on the little terrified guy in the background.
