


|
|
|
|
Viewing node Destruct Scenery
|

|

|
|
Destruct Scenery
Destruct Scenery is an important aspect of every battle or single player level. Often some treasure, ammo or secret is hidden behind the destruct scenery blocks. You probably first met them in one of the official Battle or Single Player levels. When you tried placing them yourself with a destruct scenery event on them they did not work. Why? Probably because it takes more than just placing one single tile.
Choose a section:
Making a basic destruct scenery block
1. Open your level with Jazz Creation Station (JCS).
2. Go to the area where you want to place the blocks (see figure 1.0).
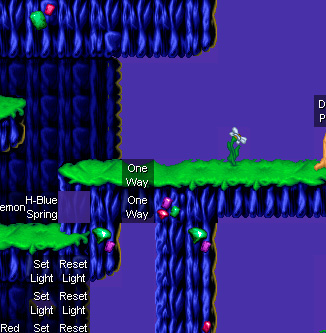
fig. 1.0 - A level
3. Now, find the destruct blocks in the tileset.
4. Click in the animated tiles window and hold the control (CTRL) key.
5. Click on the destruct scenery block (keep holding control!)
6. You now have one tile in the animated tile window. Hold the control again and click the tile that appears after shooting the destruct scenery block.
7. Click on the destruct scenery block again while holding control.
Your animated tiles screen now looks like this:

fig. 1.1 - Your 'row' of animated tiles - destruct scenery
8. Right mouse-click on the row you made your animations in. You now get a screen with 'Animating Tiles Properties'.
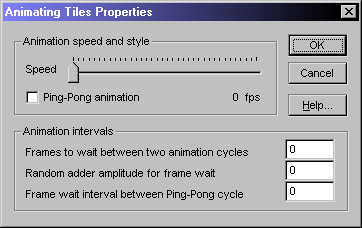
fig 1.2 - Animating Tile Properties window
9. Put the speed on 0 fps and press OK. The destruct scenery tile is now ready.
10. Click the first tile of the row in the animating tiles window and put it in your level.
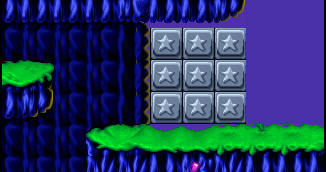
fig 1.3 - Destruct scenery in a level
11. Right mouseclick on one of the tiles and choose Select event.
12. Go to Gameplay -> Triggers and Scenery -> Destruct Scenery. Don't fill in any values and press OK.
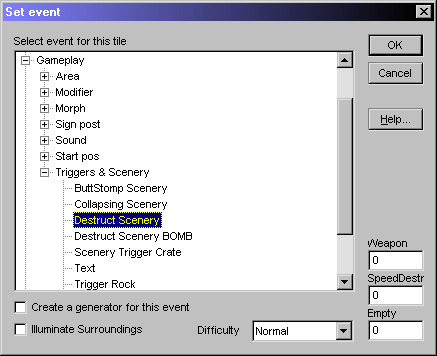
fig 1.4 - Gameplay -> Triggers and Scenery -> Destruct Scenery
13. Repeat this on each block or do it short with Shift+E.
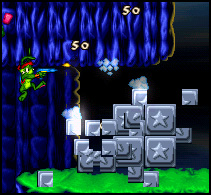
fig 1.5 - Jazz in action on the Destruct blocks
Play your level - enjoy!
Advanced Destruct Scenery
You often also see a 'counting' destruct scenery block. Each time you shoot it, the amount decreases and when you shot it 5 times it finally blows up! This can be very challenging in a race game or when you're trying to hide for somebody in Battle Game but you have to get through the blocks.
How to make counting (4-3-2-1-*boom*) destruct scenery blocks
1. Open your level with Jazz Creation Station (JCS). Note that not every tileset has counting blocks.
2. Go to the area where you want to place the blocks (see figure 2.0).
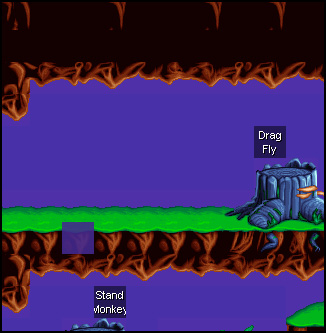
fig 2.0 - Your level (Jungle tileset)
3. Now, find the counting destruct blocks in the tileset.
4. Click in the animated tiles window and hold the control (CTRL) key.
5. Click on the counting destruct scenery blocks in the correct order of 4 3 2 1 (keep holding control!)
6. You now have five tiles in the animated tile window. Hold the control again and click the tile that appears after shooting the destruct scenery blocks.
7. Hold control again and click on the destruct scenery block of one (1). Your screen now looks something like this:

fig 2.1 - Animating tiles window
8. Right mouse-click on the row you made your animations in. You now get a screen with 'Animating Tiles Properties'.

fig 2.2 - Animating Tile Properties window
9. Put the speed on 0 fps and press OK. The destruct scenery tile is now ready.
10. Click the first tile of the row in the animating tiles window and put it in your level.
11. Right mouseclick on one of the tiles and choose Select event.
12. Go to Gameplay -> Triggers and Scenery -> Destruct Scenery. Don't fill in any values and press OK.

fig 2.3 - Gameplay -> Triggers and Scenery -> Destruct Scenery
13. Repeat this on each block or do it short with Shift+E.
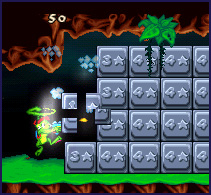
fig 2.4 - Jazz in action on the Destruct blocks
Play your level - Enjoy!
TNT Destruct Scenery Blocks
Another possibilty for Destruct Scenery is TNT Destruct Scenery Blocks. This is basically the same as the "normal" destruct scenery blocks, only the event is different. However, I'll explain it to you.
How to make TNT Destruct Scenery Blocks
1. Open your level with Jazz Creation Station (JCS).
2. Go to the area where you want to place the blocks (see figure 3.0).

fig. 3.0 - A level
3. Now, find the destruct blocks in the tileset.
4. Click in the animated tiles window and hold the control (CTRL) key.
5. Click on the destruct scenery block (keep holding control!)
6. You now have one tile in the animated tile window. Hold the control again and click the tile that appears after shooting the destruct scenery block.
7. Click on the destruct scenery block again while holding control.
Your animated tiles screen now looks like this:

fig. 3.1 - Your 'row' of animated tiles - destruct scenery
8. Right mouse-click on the row you made your animations in. You now get a screen with 'Animating Tiles Properties'.

fig 3.2 - Animating Tile Properties window
9. Put the speed on 0 fps and press OK. The destruct scenery tile is now ready.
10. Click the first tile of the row in the animating tiles window and put it in your level.

fig 3.3 - Destruct scenery in a level
11. Right mouseclick on one of the tiles and choose Select event.
12. Go to Gameplay -> Triggers and Scenery -> Destruct Scenery BOMB. Don't fill in any values and press OK.
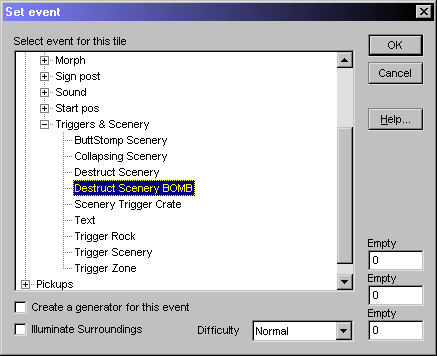
fig 3.4 - TNT Scenery Event
13. Repeat this on each block or do it short with Shift+E.
14. Make sure you place some TNTs in your level, or else you would never be able to shoot the blocks! ;-)
Play your game! - Enjoy.
Weapon Based Destruct Scenery
Sometimes it happens you can only shoot the destruct scenery blocks with a specific kind of ammo, for example the Pepper Spray.
How to make weapon based destruct scenery?
1. Open your level with Jazz Creation Station (JCS).
2. Go to the area where you want to place the blocks (see figure 1.0).

fig. 4.0 - A level
3. Now, find the destruct blocks in the tileset.
4. Click in the animated tiles window and hold the control (CTRL) key.
5. Click on the destruct scenery block (keep holding control!)
6. You now have one tile in the animated tile window. Hold the control again and click the tile that appears after shooting the destruct scenery block.
7. Click on the destruct scenery block again while holding control.
Your animated tiles screen now looks like this:

fig. 4.1 - Your 'row' of animated tiles - destruct scenery
8. Right mouse-click on the row you made your animations in. You now get a screen with 'Animating Tiles Properties'.

fig 4.2 - Animating Tile Properties window
9. Put the speed on 0 fps and press OK. The destruct scenery tile is now ready.
10. Click the first tile of the row in the animating tiles window and put it in your level.

fig 4.3 - Destruct scenery in a level
11. Right mouseclick on one of the tiles and choose Select event.
12. Go to Gameplay -> Triggers and Scenery -> Destruct Scenery. Now, change the weapon value. These are the possibilities:
0 - any weapon
1 - Blaster
2 - Bouncer
3 - Freezer (does not work)
4 - Seeker
5 - RF
6 - Toaster
7 - TNT
8 - Gun8 (does not work)
9 - Gun9 (does not work)

fig 1.4 - Gameplay -> Triggers and Scenery -> Destruct Scenery
13. Repeat this on each block or do it short with Shift+E.
Play your level - enjoy!
img:level.gif Example level (right click -> save as or a similar option)Added on: 27 February 2003 14:54. Made by Electric.
|
|
|

|

