|
Palette Swap Animations
I've heard complaints from people, generally making JJ1 conversions, that they don't understand how to make the palette swapping animations that JJ1 uses for everything except sprites. If you don't know what I'm talking about, palette swapping refers to taking a section of a 256-color palette and shifting all the colors in it one to the left or right, so colors ABCD become DABC, then CDAB, BCDA, and finally ABCD again. It's usually better looking than simply moving a waterfall tile some pixels down or whatever, though not as good as completely redrawing each frame. This is used in JJ1 for torches, flashing lights, shining ground, and pretty much everything else, especially waterfalls. However, if you just take a single screenshot of JJ1, or rip your stuff from the actual source images, you don't get the entire animation; just a single tile. Fortunately it is very simple to replicate the palette swapping effect and then place all the tiles of the animation into your tileset.
NOTE: This article requires color replace. I don't know what graphics program you're using, so figure that out yourself. In PSP it's on the tool palette.
Animating Existing Tiles
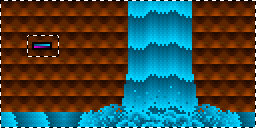
The first step is to find the tiles that you want to animate. For this article, I chose some tiles from Fanolint, because it has a good waterfall. If you're not making a conversion, you could also make your own tiles, which I'll talk about a little at the end of this article.

Go into the palette for the image and find the sequence of colors that it uses. If your program doesn't have a palette display, you will be forced to get the entire sequence by using an eyedrop tool on the tiles and then sorting them by intensity. Assuming they're all visible. Anyway, Fanolint uses a simple eight-color gradient of blue, with no repeating colors.

Place the entire sequence next to the tiles you desire to animate. Now go into the palette again and find another sequence of colors of equal length. Place those directly underneath the original sequence. For the rest of the article, these two sequences will be referred to as the Minipalette.

NOTE: The fact that the gradients go in different directions is unimportant. All that matters is that you have two different sets of colors of equal lengths. The second set doesn't even need to be in sequence, it could be totally random colors gathered from anywhere at all in the palette, except for the original sequence.
Select the entire thing, except for the Minipalette. This is one of those things I leave up to you to figure out with your graphics program of choice.

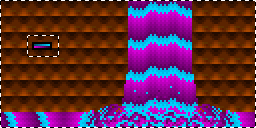
Zoom into the Minipalette, and one by one, replace each color of the top sequence with the corresponding color of the bottom sequence. The colors in the animation will change; the Minipalette will not.

(Partway through the process.)
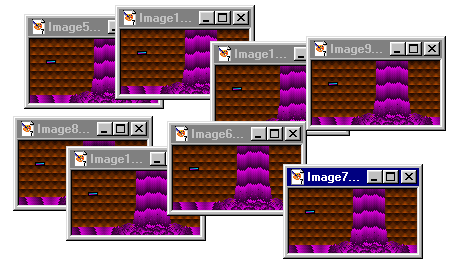
Now take the entire thing and copy it so there as many copies of it as there are entries in the sequence of colors. In this case, you will want eight copies. You may want to have these in separate images to reduce the risk of accidentally messing up the colors somewhere else in your tileset.

(Ignore the image names.)
Zoom into the Minipalettes of each image and shift the top sequence n-1 pixels in the direction you wish to animate the tiles. So in this case, shift the first image's sequence 0 pixels to the right, the second image 1 pixel, the third image 2 pixels, and so on. Then take the overlap and put it in the empty spaces.

(Continue for the other five images.)
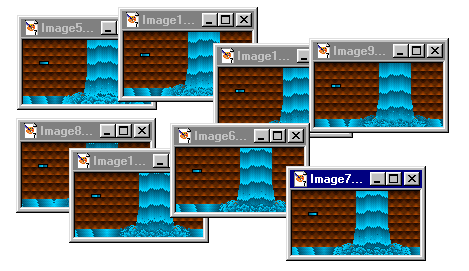
You are almost done. Now, in every image, replace each color of the Minipalette's bottom sequence with the corresponding color in the top sequence. The tiles will be restored to their original colors, but with palette swapping in place.

Hooray! Now place the tiles in your tileset and they will be all ready for JCS.
As they will appear animated:

And here's something I randomly made using the exact same method, just to show how versatile it is:

Drawing your own tiles
This probably is all pretty obvious, but I thought I should make it more obvious this isn't just limited to JJ1 conversions. You can palette swap animate anything you like, though it's admittedly preferable if it uses a gradient. All you really have to do is have all or part the gradient in the tile, probably looping, and it can take any form you like. A few examples, all drawn by me with various degrees of care:


FINAL NOTE: A few JJ1 tilesets have what I call "curved" gradient sequences, which start off dark, go light, and then return to dark again. That works just the same way, except for one minor detail: sometimes they reuse colors. The same medium-brightness color may be used on both the increasing and decreasing sides. This totally messes up color replace tools, so do your best to get all the colors to be different before you start editing anything - change the palette used by the image, edit the palette, do whatever works with your graphics program. An attempt to use color replace on an unfixed color-repeating curved gradient sequence will have imperfect results.Added on: 12 August 2006 22:24. Made by Violet CLM.
|
|

