 |
| The Textured Background | ||
One of the most frequently asked questions I get about tilesets (apart from the obvious “How do I make a tileset?”) is to do with textured backgrounds either asking “How do I make a textured background?” or “Why doesn’t my textured background work?”. Before I get into the technicalities on making a textured background there is something you should know first. There is no rule or law out there that says that every tileset has to have a textured background, it is completely up to you. While they are pretty cool, it doesn’t make a tileset good or anything, there are some GOOD tilesets out there (Egypt by Agama has to be the best of these along with being one of the best tilesets in existence) that don’t use a textured background. If you can’t make a textured background work no matter how hard you try or you just don’t like them then don’t make one. There are other great alternatives to using layer 8, just be creative. 
If I told you right now that it was easy to make a textured background I would be lying, there are 101 things to keep in mind while making one along with 101 things that could go wrong during this time, and even the smallest mistake can cause a disaster. That’s why I’ve given textured backgrounds its own section in this tutorial site. I’ll also make use of the colour scheme I’ve made for the website. Everything in a green table is the steps you should do to make a textured background, and everything in a brown table is what you should do if things didn’t work out exactly (and I mean EXACTLY) like the instructions in the green table. Don’t worry if things don’t work out like said in the green box, you didn’t do anything wrong, they just never do work out perfectly, even for me. If it all does end up working perfectly without having to fix anything you are the LUCKIEST tileset maker in the whole world. So how does a textured background work? Well, it’s sort of like an advanced palette event, except instead of actually using a pre-drawn event it needs you to draw the background yourself, which also makes it a bit like an event tile. Personally I like to think of a textured background as the super-mutated Godzilla of palette events that needs lots of care and attention or it will grow into a huge monster when things go wrong. Before I get too carried away (if I haven’t already) in explaining what textured backgrounds are like, here are the step-by-step instructions on how to make one:
|
| 1. Draw a Texture | ||
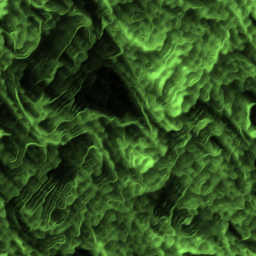 There’s no surprise here, you need a texture in order to make a textured background. While there are many ways and different programs to use to make a textured background, my personal favourite is making them using TeraLogic Texture Maker (download it HERE). The program’s sole purpose is to make textures and it does a very good job at it, all you need for drawing (more like generating) a good textured background. I would write a tutorial on how to use the program, but there’s no need because it already comes with a great tutorial, just run ‘index.htm’ in the ‘HELP’ directory and that should get you started.
The texture you make needs to be 256x256 pixels (default size for TeraLogic Texture Maker), if you want it can also be 128x128, 64x64 or even 32x32 pixels but unless you don’t have enough space in your tileset then you shouldn’t make smaller textures. Smaller size means the texture is more repetitive and boring as it doesn’t leave you with enough space to make a decent texture. Remember to set the Post Render value to ‘Monochrome’ when under the ‘Finished’ tab before you save it. Don’t worry too much about the colour, you can change it later (I love palettes
|
||
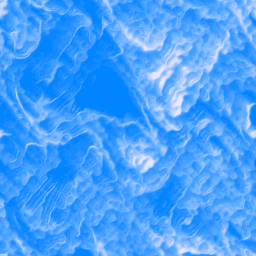
So you can’t make a texture? Shame on you! Well, if your textures just don’t seem to work out well no matter how hard you try there’s a very easy alternative. All you need to do is press the ‘Witch’ button in the top-left corner of TeraLogic Texture Maker and it will generate a random texture for you, while most of the time it’s just a random mess you do get some really good textures if you press the button enough times. Don’t believe me? I made the example texture above using ‘Witch’ just to prove it.   When using ‘Witch’ it’s even more important to set the Post Render value to ‘Monochrome’ because it just randomly selects different colours as well, something not good for textured backgrounds or for colour reduction (it even violates the GOLDEN RULE OF COLOUR REDUCTION!). |
||
| 2. Reduce the Amount of Colours to 32 | ||
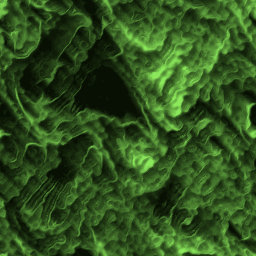 Textured backgrounds use palette entries 176-207, which are exactly 32 entries. Each of these entries should be filled with its own unique colour, meaning that a textured background should be 32 colours. Decreasing the total amount of colours is really easy; all you have to do is go to ‘Colors-->Decrease Color Depth-->X Colors (4/8 bit)…’ and set the amount of colours you want to 32. If your textured background is monochrome (it should be) then you should barely notice any loss of quality. 32 colours is more than enough colours for monochrome images to retain its original quality. Believe it or not, the example image above is actually 32 colours while the one in the section above is 256 colours (In a true monochrome image there is no quality difference between 256 colours and 24-bit). Both are barely any different from the 24-bit version, so don’t think of this step as loss of quality like you would with other 24-bit tileset images, think of it as an important step in getting the texture ready for your tileset.
|
||
| There are times when a colour reduction doesn’t decrease your texture to exactly 32 colours, but less instead. Don’t worry if this happens, because in reality textured backgrounds don’t have to be 32 colours at all, they can be much less. The only important thing to remember is that no matter how many colours your texture has, the colours it does use should always be located within the range of palette entries it uses (176-207). There are other small things you should do when your textured background is less then 32 colours, but it’s too early to do them now; I’ll explain later when your palette is ready. | ||
| 3. Make a Palette for your Textured Background | ||||
|
Yes I know that a texture with 32 colours already has a palette, but I’m talking about a real working palette, a palette that makes the texture ready for use in your tileset and places it inside all the correct entries. You need to start with a blank palette; the 32 colours palette you made while doing colour reduction will only be used as a guide. You’ll be using Palette Suite for most of the palette editing, so start by opening a new blank palette and going to the ‘Edit Palette’ tab.
|
||||
| 4. Load the Palette into your Textured Background | ||
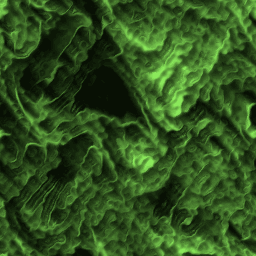 This step is short and easy, open the 24-bit image (or 256 colour if you didn’t save it at that quality) of your textured background in Paint Shop Pro. Next, load the palette (Colors --> Load Palette) you just made in the previous step into the image. Make sure to apply the palette using ‘Nearest color matching’ or there will be a nasty surprise waiting for you. That’s all there is to do! If only everything was this easy. 
I’ve included the example image above with the new palette already loaded so can have a preview of what it will look like when this is done. From now on this image of the textured background is the only one you should use in the future steps. The other images don’t have the correct amount of colours or palette entries, so close them, delete them, do anything to make 100% sure you won’t accidentally use them instead of the textured background you just made.
|
||
| When this step is done, you should also check how many colours there are in your textured background, do this by going to ‘Colors --> Count Colors Used’. If the amount of colours is 32 then the palette was loaded perfectly and you won’t have any troubles concerning the colours in the future. If it’s less than 32 colours then there are a few things you must do later on to fix the problem. It’s too soon to do it now, but I’ll explain what to do later on. | ||
| 5. Change the Colour of your Textured Background | ||
|
This step is completely optional; you don’t have to do it if you are happy with the colour of your textured background. However, if you are not happy with the colour of the textured background this is where you can change it to pretty much anything you like and it’s very easy to do too. All you need to do is change the lightest and darkest colour of the gradient between palette entries 176-207 in Palette Suite and press the ‘Gradient’ button again. Basically this means that you can change the colour of your textured background by changing the colour of the gradient in palette entries 176-207.
Once you have a new gradient you can easily load it into your textured background, the shortest way is to just export (File --> Export…) it right out of Palette Suite into your textured background image, but you can also save the palette and then load it in Paint Shop Pro (Colors --> Load Palette…). Remember to apply the palette using ‘Maintain indexes’ when loading a different gradient in Paint Shop Pro because ‘Nearest color matching’ is a nightmare when all the colours have changed.
|
||
| 6. Load the Palette into your Tileset Palette | ||
|
By now the textured background and its palette are finished and ready to be merged with the rest of the tileset. The palette is the first thing that needs to go in, as you need all the colours to be ready before you can load the actual image into the rest of the tileset. Loading the palette is as easy as copy and paste; select the gradient between palette entries 176-207 in your textured background palette and go to ‘Edit --> Copy’.
Next, load the palette you made earlier for your tileset (There is more info on palettes for your tileset in the Palette section HERE), select palette entries 176-207 and go to ‘Edit --> Paste’ to paste the colours into the tileset palette. If there already were a few colours in these palette entries, you need to move them before pasting, but if there already was a gradient to use for a textured background you need to delete it and replace it with the new one. Once this is done just save the palette and load it back into your tileset image.
|
||
|
Before you carry on to the next step you need to check if all the colours in palette entries 176-207 are unique (not used anywhere else in the palette). You can do this in Palette Suite by using Select Matches (Selection --> Select Matches) and see if it selects any of the palette entries in between 176-207. If it does then you have no choice but to change the colour of the textured background. Go back to step 5 and redo everything up to this point until all the colours in palette entries 176-207 are unique from the rest of the palette.
Note: You can also change the colour by just a small fraction so that it looks the same but makes all the colours unique. The best way to do this is to select the gradient and use the ‘+/- Brightness’ effect and increase the brightness by about 10. |
||
| 7. Load the Textured Background into your Tileset | ||
|
Now that the image of your tileset has all the colours it needs in palette entries 176-207 you can finally copy and paste the textured background into you’re your tileset and know that it’s all fixed and ready to use without any problems in JCS. There is no special trick to this step, just copy the texture and paste it into a blank 256x256 area into your tileset. Because all the colours it uses are unique it will automatically use palette entries 176-207 in the tileset image.
The only thing you must do now is to MAKE SURE YOU USE THE CORRECT TEXTURED BACKGROUND! In case you haven’t noticed, there are quite a few textured backgrounds on this page and believe it or not, each an every single one is different. If you had to change the colours by a small fraction to make them unique then you need to make 100% sure that it is the correct textured background, as the different versions will look exactly the same to the human eye.
|
||
 So you have a textured background with less then 32 colours? This is where you fix it. Even though your textured background doesn’t have all 32 colours, you need to make sure that all 32 of these colours in palette entries 176-207 are placed somewhere inside your tileset image. I used to just draw a small gradient in a tile with all the colours (32 pixels in a tile and 32 colours means it fits in perfectly). You might have noticed this in some of my tilesets (the small gradient image to the top-left is the 32-colour gradient of the example texture used in this section), but thanks to the awesomeness of Palette Suite v2.31 there is an even easier way to do it. So you have a textured background with less then 32 colours? This is where you fix it. Even though your textured background doesn’t have all 32 colours, you need to make sure that all 32 of these colours in palette entries 176-207 are placed somewhere inside your tileset image. I used to just draw a small gradient in a tile with all the colours (32 pixels in a tile and 32 colours means it fits in perfectly). You might have noticed this in some of my tilesets (the small gradient image to the top-left is the 32-colour gradient of the example texture used in this section), but thanks to the awesomeness of Palette Suite v2.31 there is an even easier way to do it.
Load your tileset palette (the one that includes the textured background) into Palette Suite and save it as a bitmap image. Go to ‘File --> Save As…’ and in the new window that opens in the ‘Save as type:’ box choose ‘BMP Image (*.bmp)’. This will save a small 16x16 bitmap image of all the colours in your palette so that you can copy and paste it into your tileset image. |
||
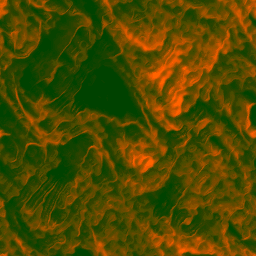
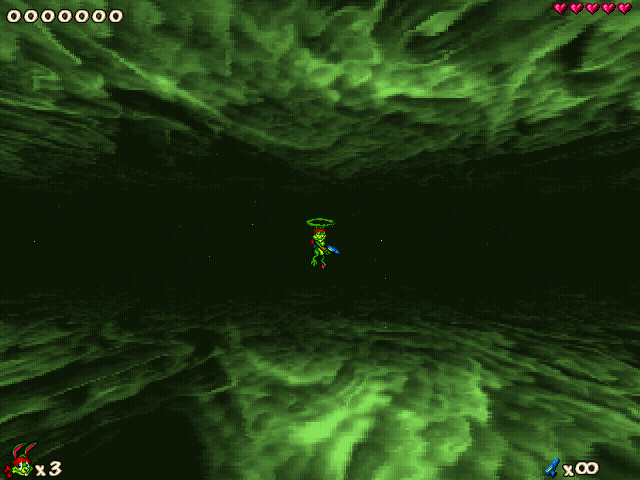 That’s all folks, everything you need to know about a textured background and all the steps you need to follow in order to make a working one. Above is a screenshot of the example textured background in Jazz2, looking good. 
However, there is more to textured backgrounds than when I’ve just written about. Violet CLM aka Unknown Rabbit, along with the help of URJazz has written an article on textured backgrounds in the ‘Articles’ section of the Jazz2Online website. It’s a very informative article that covers pretty much completely different areas of textured backgrounds that I’ve just written about. It also lets you in on the secret that textured backgrounds don’t always need palette entries 176-207 and don’t always need layer 8 in order to work, scary stuff. Personally I still use palette entries 176-207 for my textured backgrounds because it makes the water work and I like the blending more than the infinitely looping textured backgrounds, but we all have our different tastes.
You can read the article in all its glory by clicking the link HERE. I’m not going to cover that info on this website because some people might think I did all that research while the credit should really go to Violet CLM and URJazz, thanks guys!
|
-=Tutorials=-
[Part 3: Making the Palette|Part 4: The Textured Background|Part 5: Making the Mask]

 )
)
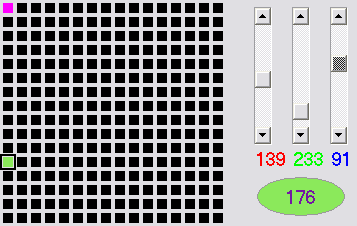 Now for the interesting stuff, place the lightest colour from the textured background (you’ll find it in the palette of the 32 colour version you made) in palette entry 176, the example above has 139 red, 233 green, 91 blue as its lightest colour. After that you need to place the darkest colour of the textured background in palette entry 207. If your darkest colour is black (or very near black) then you have a problem, JCS would replace this colour with the transparency colour (pure black) and transparencies in textured backgrounds do NOT work well.
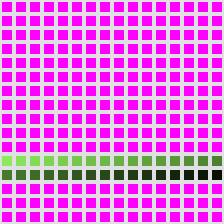 This next step will fill in the rest of the entries with all the important colours. Go to the ‘Special Effects’ tab in Palette Suite, select entries 176-207 and press the ‘Gradient’ button. You should now see a smooth gradient going from the lightest colour to the darkest colour, so all that is left is to fill the whole palette with pinkness. Invert the original selection (Selections --> Invert Selection) of the gradient to select everything outside it and press the ‘Fill’ button so that you can fill all the selected entries with the colour in palette entry 0.

