 |
| Starting a Tileset | ||
|
Ok, Iím starting (wow). Iím sure you all know by the description Iíve given that this tutorial will tell you all you need to know about the basics of making a tileset. If you have no or very little experience about tilesets, this is where you start out!
|
| The Basics | ||
|
First of all, there is something I have to make clear about tilesets. I said this was going to cover the basics, and this is as basic as it gets, but itís one of the most important parts of making a tileset. A tileset is a picture (or an image if you prefer), yes thatís it, just a picture. If you do not like drawing pictures, then making a tileset is not for you. If you donít know how to draw a picture, or arenít very good at making a picture, then this tutorial (and lots and LOTS of time and patience) is all you need for making a tileset.
And that concludes the basics of tilesets! Thanks for reading my tutorial!
|
| Tiles | ||
 The most important part of a tileset is that it is made of tiles. These tiles are the Ďblocksí you can select in JCS and place inside your level, and have to Ďtileí with each other. Basically this means that the individual tiles should be drawn to fit next to each other to form a big seamless picture. Iíll go into more detail with this later when explaining how to draw a tileset, but for now I will explain how tiles work in JCS. The most important part of a tileset is that it is made of tiles. These tiles are the Ďblocksí you can select in JCS and place inside your level, and have to Ďtileí with each other. Basically this means that the individual tiles should be drawn to fit next to each other to form a big seamless picture. Iíll go into more detail with this later when explaining how to draw a tileset, but for now I will explain how tiles work in JCS.
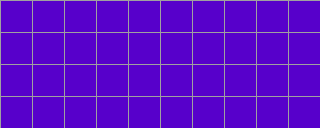
Each tile is 32x32 pixels in size. Tilesets have to be a perfect fit of tiles, it cant be 10 and a half tiles high, or 7 and a quarter tiles wide. Tilesets have to be 10 tiles wide, which means all tilesets have to be 320 pixels wide. While this canít be changed, the height of a tileset can. Apart from these rules, JCS has a maximum amount of tiles a tileset can have. In normal Jazz2, a tileset has a 1023 tile limit. In TSF (The Secret Files expansion pack to Jazz2), the tile limit is increased to 4095 tiles, this is FOUR TIMES the amount of tiles that normal Jazz2 uses, and is virtually impossible to fill. Both of these limits are strange for tilesets, I said earlier that tilesets have to be 10 tiles wide, which makes it impossible to have tilesets that are 1024 and 4096 tiles big, but in fact 1020 and 4090 tiles in size. This is because a tileset is not only made up of the tileset image itself, but also the animation tiles shown below the tileset. If your tileset is 1020 tiles, then you can have 3 animations in a level. If the tileset was 1000 tiles, then you can have 23 animations in a level. When starting to make a tilesets this isnít too important, because early tilesets very rarely reach 1000 tiles.
|
| Colours | |||||||||||||||||||||||||||||||||||||
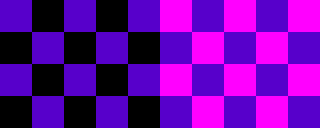
Another small yet important part you need to know about making tilesets is to know what colours to use. Yes this is pretty important for anything you have to draw, but even more so with tilesets because it uses a set palette that takes information from these entries (Iíll go into more detail at the palettes section). What you need to know in the basics of tileset making are the transparent colours Jazz2 uses. In case you donít know already, a transparent colour is the colour a program uses to indicate when something isnít there. Itís kind of difficult to explain in words, letís just say that the colour is turned invisible by the program. Jazz2 uses two transparency colours. One Iím sure you all know of and another one not quite as well known. The first colour is the blue you see in JCS, I myself just call it Jazz blue or the Jazz transparency colour, Iím not sure if it has a special name and even if it does thatís not too important to remember. What you need to know is that if you plan on making tilesets youíll be seeing a LOT of this colour. 
The second of the transparency colours is black, just plain black, no explanation needed. The reason most people donít know about it is because JCS automatically converts it to Jazz blue when it compiles the tileset. I personally donít recommend using it since it can cause some problems (itís hard to see differences in colour against a black background), but it has got some nifty uses Iíll go into later. Hereís a small table with the details on the two transparency colours:

|
| What is Needed? | ||
|
This section will tell you all about the different programs used to make tilesets, I use all of them myself, so they will definitely be useful, and do a great job at getting the job done. Personally I think theyíre all great (why would I use them otherwise?) and have always recommended them to anyone who asks what programs are needed to make tilesets.
As with any picture on the PC, to make a tileset you need a drawing program. This could be almost any drawing program, but I use Paint Shop Pro, and most of my tutorials will focus on using Paint Shop Pro. I will not explain any other program, not because of my extreme bias towards Paint Shop Pro (hehe
Apart from a drawing program, you also need something that can edit palette files. Paint Shop Pro can do this, but take my advice: if you ever want to edit palettes (and you will do when youíre making tilesets), the program you need to do this with is Palette Suite! Itís by far the best palette editing program I have seen, and to make it even better, itís made by a fellow Jazz2 player, Toxic Bunny! I am really hyping this program, but itís all deserved, Toxic Bunny did a GREAT job with it! If thatís not enough, itís FREE! Everyone should thank him, give him a hug or something, and then offer him something to drink (heís always thirsty
Another program you could need, is TeraLogic Texture Maker. This is used to generate seamless textures 256x256 pixels in size. Oh gee, this is a coincidence, did you know that textured backgrounds in tilesets have to be seamless textures 256x256 pixels in size? Yes, itís great for making textured backgrounds, and textured backgrounds look great in tilesets. It even comes with a tutorial on how to use the program, and itís free, perfect.
|
| Using a Grid | |||||||||||||||||||||||||||||||||||||||||||||||||||||||||||||||||||||||||||||
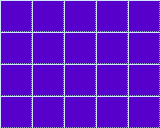
A problem with drawing tilesets, is keeping the tiles aligned. If your tiles are unaligned, even by just ONE (1!!) pixel, your whole tileset will be a mess. Iíve had it happen before quite a few times, and believe me, it is not a nice thing. It could take hours to fix. However, there is a simple way to prevent this from happening, making a grid. With a grid, you have a guide to show you exactly where to draw your tiles to keep everything aligned. You have to use a grid when making a tileset, their function is too important to just ignore one altogether! The great thing about a grid for a tileset is that it is fully customisable; when you make a grid you can make it just the way you like to use it. There is no absolute correct way to do it, as long as it shows where the 32x32 tiles are then it will work. However, most grids follow common patterns, the three main ones are listed below.
 Yes, itís for real this time. However, I know how everyone just LOVES reading (just like I LOVE typing all this out) so at the end of each one of these sections Iím going to include a short list of all the important bits of info for all those lazy readers out there.
|
| Starting a Tileset | ||
|
|
||
-=Tutorials=-
[Part 1: Starting a Tileset|Part 2: Drawing the Tileset]


 Jazz Blue
 Black
Black ), but because I donít have enough experience with any other drawing programs to write tutorials about them. I STRONGLY recommend Paint Shop Pro for tileset making though, Iíve never needed anything else from a program, and even Agama uses it! However, Iím sure there are many other drawing programs out there that can (almost) make tilesets just as good as Paint Shop Pro. All the program needs is the ability to work with palettes and be able to save files in .BMP or .PCX format. Thatís not a lot to ask for, but when it comes to the basics thatís all you need!


 Page 1: The Basics