
 |
| Drawing the Tileset | ||
|
Welcome to the drawing section of the tutorial. Just imagining how big this section is going to be makes me tremble in fear of writing it already, but it is big for a very obvious reason. Tilesets are made by drawing, sure there’s a bit of palette work, planning and masking involved, but it’s all to support a drawing. Unfortunately, you can’t teach someone how to draw, there is no way you can make tilesets like Agama by reading a tutorial, it just can’t be done. Allow me to repeat that:
There is no way you can make tilesets like Agama by reading a tutorial, it just can’t be done.
This section also won’t contain any step-by-step instructions on how to draw different objects in Paint Shop Pro (bricks, trees, grass etc.). Some of you will be disappointed at this, but you shouldn’t be worried. There are ways to make a good tileset no matter how good/bad you are at drawing, and (along with some drawing methods, tips and tricks) that’s what this section is all about.
|
| Drawing Methods | ||
Because tilesets use a palette there was a split that caused two different drawing methods to be used for making them, I like to call them the 256 colour method and the 24-bit method. These two methods vary greatly, each having its own pros and cons and a unique style, but both have been successful at making great tilesets, and both are being used by the top tileset makers out there. Once again there is no ‘correct’ way of doing it, what you use to make tilesets is all up to you, isn’t it great? 
|
| 256 Colour Method | ||
|
Tileset maker examples: Agama (wow!), Blade, Mirrow, Skulg
This is definitely the easiest method to use when drawing tilesets and the style used makes most of the tilesets using this method have a bit of a ‘cartoony’ look. If you’re new to making tilesets or, even more important, editing palettes then I HIGHLY recommend using this method first a few times before trying to make a tileset in 24-bit. The 256 colour method requires you to start off by first making a palette for your tileset. It’s a bit of a jump to go to palette editing right now, but making the palette first (changing the tileset image to 256 colours only, hence the name of the method) will fix so many possible errors that could happen later, and the overall amount of palette editing and tweaking is much less than that of the 24-bit method. You can jump to the Palette section of the tutorial for more information on making one. Also, this method is perfect if you love testing your tileset in JCS and/or Jazz2 a lot because it can easily be compiled at any time during production. However, the main problem with this method is that most drawing programs’ (Paint Shop Pro being one of them) tools only work with 24-bit images, so many of these you can’t use while making your tileset. Because of this, drawing a tileset using this method is a bit like using Ms Paint; you use basic drawing tools (brush, line tool, fill tool etc.) and select the colours you use from an already made list. Don’t be put off by this though, the difference is that you have more control over the colours you use (you can pick them all yourself and have a lot more to choose from) and, believe me, that makes a HUGE difference.
Pros and Cons:
|
||
| 24-bit Drawing Method | ||
Tileset maker examples: BlurredD, Dethman, Disguise (me  ), ET ), ET
Drawing a tileset using this method is a bit like ‘pretending’ that tilesets don’t use a palette at all. Everything in the tileset is drawn without ever using a palette until the very end when everything is finished and you need to compile the tileset. At this point you do a colour reduction to reduce the amount of image colours enough to fit it all into a palette and cross your fingers hoping you didn’t lose too much quality. Sometimes it works great and you barely see a difference, but sometimes the result is just plain ugly. There are ways to make the colour reduction turn out better, but I’ll discuss this in more detail later. Apart from having a huge set of colours to work with, because you’re not using a palette you can make use of any tools the program you use has to offer without any limitations. For people used to using programs like Paint Shop Pro or Photoshop this is a dream come true, you can go absolutely nuts over layers, feathering, blur, gradients, filters and anything else you like to use with almost no limitations whatsoever. All of this has given people using this method quite a lot of control over what they’re drawing, and the end results always tend to look a bit more ‘realistic’ instead of the ‘cartoony’ look the 256 colour method tilesets have. However, all this freedom comes at a cost and making one of these tilesets JCS compatible could be a nightmare, hundreds of things can go wrong, and fixing them is another nightmare if you don’t know what’s going on in the palette. This makes testing or compiling through making the tileset almost impossible, and a lot more palette work is required to make sure nothing goes wrong. However, with programs like Palette Suite around this is a lot easier than what it used to be.
Pros and Cons:
|
||
| Feather and Blur | ||
|
In my opinion, one of the greatest things about being able to draw in 24-bit mode is that you can use the feather and blur tools. Sure these two tools might look simple at first glance, but hidden inside them they have the most amazing functions capable of fixing pretty much anything. I’ve gotten addicted to both; I can’t ever imagine making a tileset without them. This little topic is dedicated to their greatness, and will show things about these tools only a few people know of.
|
| Feather | |||||||||||||||||||||||
|
The feather tool is a bit of a mix between the selection tool and the gradient tool. It’s used to make a gradual selection between a full selection and no selection at all. This feature, along with a little layer work, makes it great for blending different things together, here are two examples: Note: The first example will go into a lot of detail on feathering and layers, as I’ve heard quite a few people say that they don’t understand how it works. After that I’ll assume that people know how to use these tools and will write more about the important stuff. 
|
| Blur | ||||||||||||||||||||||||||||||||||||||||||||||||||||||||||
Blur tool is used for well…blurring things. It makes objects smoother by smudging it with their surroundings. This procedure does however give a loss of quality or texture, but luckily by how much you blur and exactly in what way you blur is very customisable and can be tweaked to work in the way you want it to. Apart from doing the obvious, blur has another VERY useful function when it comes to making tilesets. I’m not sure how or when I discovered this, but when I did I saved myself hours of work and tweaking, and here it is. Ladies and gentlemen, the blur tool that I present to you today…has the ability to make just about any texture tile-able! GASP!  Now with no further delay, here’s an example:
|
| Drawing the Tileset | ||
|
|
||
-=Tutorials=-
[Part 1: Starting a Tileset|Part 2: Drawing the Tileset|Part 3: Making the Palette]

 ) and texture B (
 ) (you can save and use these two as work-through examples if you want). Now I think texture A would look great as a platform to walk on above texture B, but the problem we have is when we put these two textures together is that they don’t tile with each other.
 Now paste texture A into a blank area of the image, and make sure that there’s enough space for texture B underneath along with open spaces around the sides. The next part is where it gets tricky, whenever you use feather on something it has to be in a separate layer to the background layer. Layers shouldn’t be too complicated to understand, they work in exactly the same was as layers in JCS, but are just more customisable.
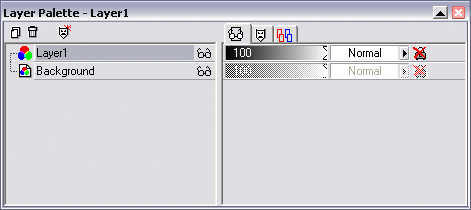 Firstly, open the Layer Palette (
 Push this button in the toolbar on the top). The view of the layer palette at this moment will only display the Background layer (the default layer in any image), add a new layer by pressing the ‘Create Layer’ button (
 This one) in the top-left corner of the Layer Palette. Don’t worry about any of the values in the new window that pops up, just leave all of it as default and press OK.
 Everything you add to the image now will be put in this new layer, so copy and paste texture B into the new image so that it fits directly underneath (location in the image not underneath the layer, it's actually above in terms of layers) texture A.
 This button) so you can work on them separately to prevent confusion on what is placed in the different layers.
 Another thing to remember when blending things using feather is that there must be an overlap between the two pieces, so before using the feather tool I added a small 8-pixel overlap of texture B over texture A. Make sure that the overlap is placed above texture A in Layer 1 instead of on the background layer.
 Next you need to select an area for the feathering to take place from, so use the select tool to make a selection (still being in Layer 1) that includes the whole area above texture B, all the way up to the point where the overlap ends.
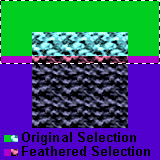 You are now (finally!) ready to use the feather tool. Go to ‘Selections --> Modify --> Feather’ (or you can use the shortcut keys ‘Ctrl+H’), set the number of pixels to 8 and press OK. At first sight it might look like the selection was just expanded by 8 pixels, but the feathered part is a gradual selection, slowly selecting less and less of the actual image until at the end of the selection it selects nothing at all. Hopefully this example image might explain it a bit better. The green area is the area of the original selection before feathering, and the red area is the feathered area that’s gradually going from a full selection to no selection at all.
 Here is a zoomed in version of the blending, after you merge the layers back together (Layers --> Merge --> Merge All) you can start to use this for pieces of a tileset like I’ve done.

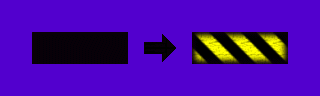
 First off we need a nice looking texture, to make this a bit more fun I’ll use the black and yellow grid texture from my Space Warbase tileset as an example for everyone to use. Besides, after all that typing on the previous example I’m too lazy to make a new one.
  Start by making a new image 160x96 pixels in size, and in the middle fill it with a near-black colour 96x32 pixels in size (the size of the texture above). Remember that pure black is transparent in JCS so you can’t use that, the closest colour to black you can use is a very dark purple (‘7 red – 0 green – 11 blue’ with hexadecimal #07000B) that’s already located in the Jazz2 palette for you to use.
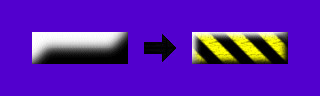
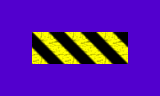 Next, make a new layer and place the texture directly above the black area in the middle so it completely overlaps it.
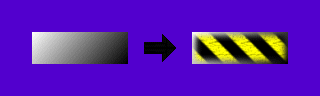
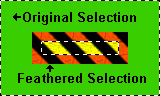 You can then use the Magic Wand Tool (
 This one) to select the whole area outside of the texture in the new layer, which is followed by using Feather (Selections --> Modify --> Feather) and once again setting it to 8 pixels (this is just a coincidence). I’ve included another colour coded image to explain this once more so you are sure to know what areas you are selecting.
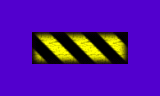 Then as a final step press delete four times (or as many times as you like) and your tiles should look exactly like the ones in the Space Warbase tileset or the example.

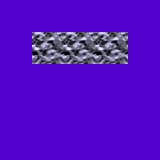
 Before we start, we need a texture that doesn’t tile. This is fairly easy to make, but I’ll supply you with one anyway.
 I know it’s ugly, but what’s important is that it doesn’t tile (as you can see with the example image). Ironically, the example image that shows that the texture doesn’t tile is exactly what you need to make it tile. Place the 32x32 texture in a large image and surround it with itself so that you have a 9 of the same texture in a 3x3 block.
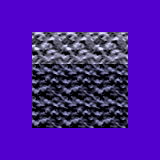
 Now all you need to do is use blur (Effects --> Blur) and the texture will be tile-able! I used a Gaussian blur of 1.5 on the example image, but the amount you have to blur all depends on how much the texture is out of sync. Your texture won’t look exactly the same, but that’s a small price to pay for making it tile, and you can always use a bit of sharpen (Effects --> Sharpen) to counter the blur.
 I used ‘Sharpen More’ twice to get the end result, but remember that using sharpen is the same as blur, to make sure that the image can still tile you must surround it with itself.
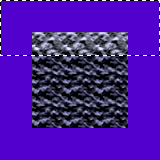
 Yes it’s that easy to do, but there are two things to remember when doing this. The first is that in the block of textures only the middle one will tile, the rest should be discarded. The second is that you cannot use this method to tile more than one type of texture with one another. The only method I know how to do this is to use the good old fashioned paintbrush and draw the edges to fit together. It takes forever to do, but sometimes it’s worth the effort to have more than one texture that can tile with one another.
 Page 1: Drawing Methods/Feather and Blur